
With scheduled emails in Gmail, you can set your emails to send later without setting yourself a reminder. The feature really comes in handy when you want to realize smart working over working hard and dealing with multiple time zones. It introduces immense flexibility to your life because you no longer become glued to your computer waiting for the appropriate time to hit the send button.
Failing to use the schedule email in Gmail can prove costly. You may compose one of the most intriguing emails, but still, it goes unrecognized. That’s because you send it when people are less likely to read. Additionally, you could easily find yourself lost in the mix of life and forget to pass across an important message.
With these in mind, scheduled emails in Gmail become a much-welcomed feature. So, how do you go about scheduling emails in Gmail? Read on this guide for a detailed explanation.
When to use delayed emails in Gmail?
Generally, scheduled email in Gmail can benefit you in the following ways:
- Overcome time zone differences – Sometimes, you may send an email at 7 am in your time zone, but it gets delivered at 7 pm. Email scheduling works around this problem by allowing you to set your clock to a time when recipients will likely read the email.
- Make sure the client sees your emails at the right time – Besides the time zone issue, it is a good idea to generally send your emails at the most appropriate time for your clients. For instance, sending emails on a Friday night might fail to achieve the desired goal. You could compose your email on Friday and schedule it to send on Monday at 8 am. Doing so would make you sound more productive and punctual.
- Write your emails when the time suits you – Thanks to email scheduling, you no longer have to type your emails at specific hours. If you feel more active late in the night, you can start working on your message and set it to send during the day.
- Set timely emails in advance – You can use scheduled emails to show thoughtfulness, like never missing a client’s birthday or an important anniversary. You can use recurring scheduled emails to set this up just once. Another useful way to use recurring emails in Gmail is to set reminders to clients to fill out a monthly report, or remind your team members of a weekly meeting.
Delayed vs recurring scheduled emails in Gmail
The difference between recurring and delayed emails in Gmail is that recurring emails are timely repetitive emails sent to send on a regular basis while delayed emails are simply a one-time trigger set to send one email at a predetermined time. Delayed emails are available as a Gmail feature, but setting recurring emails requires installing a Gmail add-on.
Disappointingly, Gmail currently allows you to schedule just one delayed email at a time. If you want to schedule a recurring email you’ll have to use a Gmail extension. To read about a recurring scheduled email solution jump over to the next section, where we cover 2 great tools that add this option to your Gmail.
How to schedule delayed emails in Gmail (step by step with screenshots)
The available delayed emails feature in Gmail is an extremely useful feature, even though it schedules your message just one time.
With this feature, you don’t have to worry about having to send an email at the wrong time, or failing to send it at the right time, because you planned to send it at a certain hour but forgot. Simply compose your email and specify the time you want it to send, and you are good to go.
Note: Before setting a scheduled send in Gmail, a point worth noting is that all times on the schedule email page are given as per your time zone. Thus, when working with an alternate time zone, you should do an online conversion to know the exact time to use it.
Send an email at a specific time Gmail
Sending an email at a specific time does not require rocket science. Please follow the below steps to send an email at a specific time
Step 1: From the “compose email window“
Step 2: “Click” on the “drop-down arrow” near the “Send” button
Step 3: “Click” on “Schedule Send“

Step 4: “Select” “Pick date & time“
Step 5: “Fill in” the time you would like to send your email
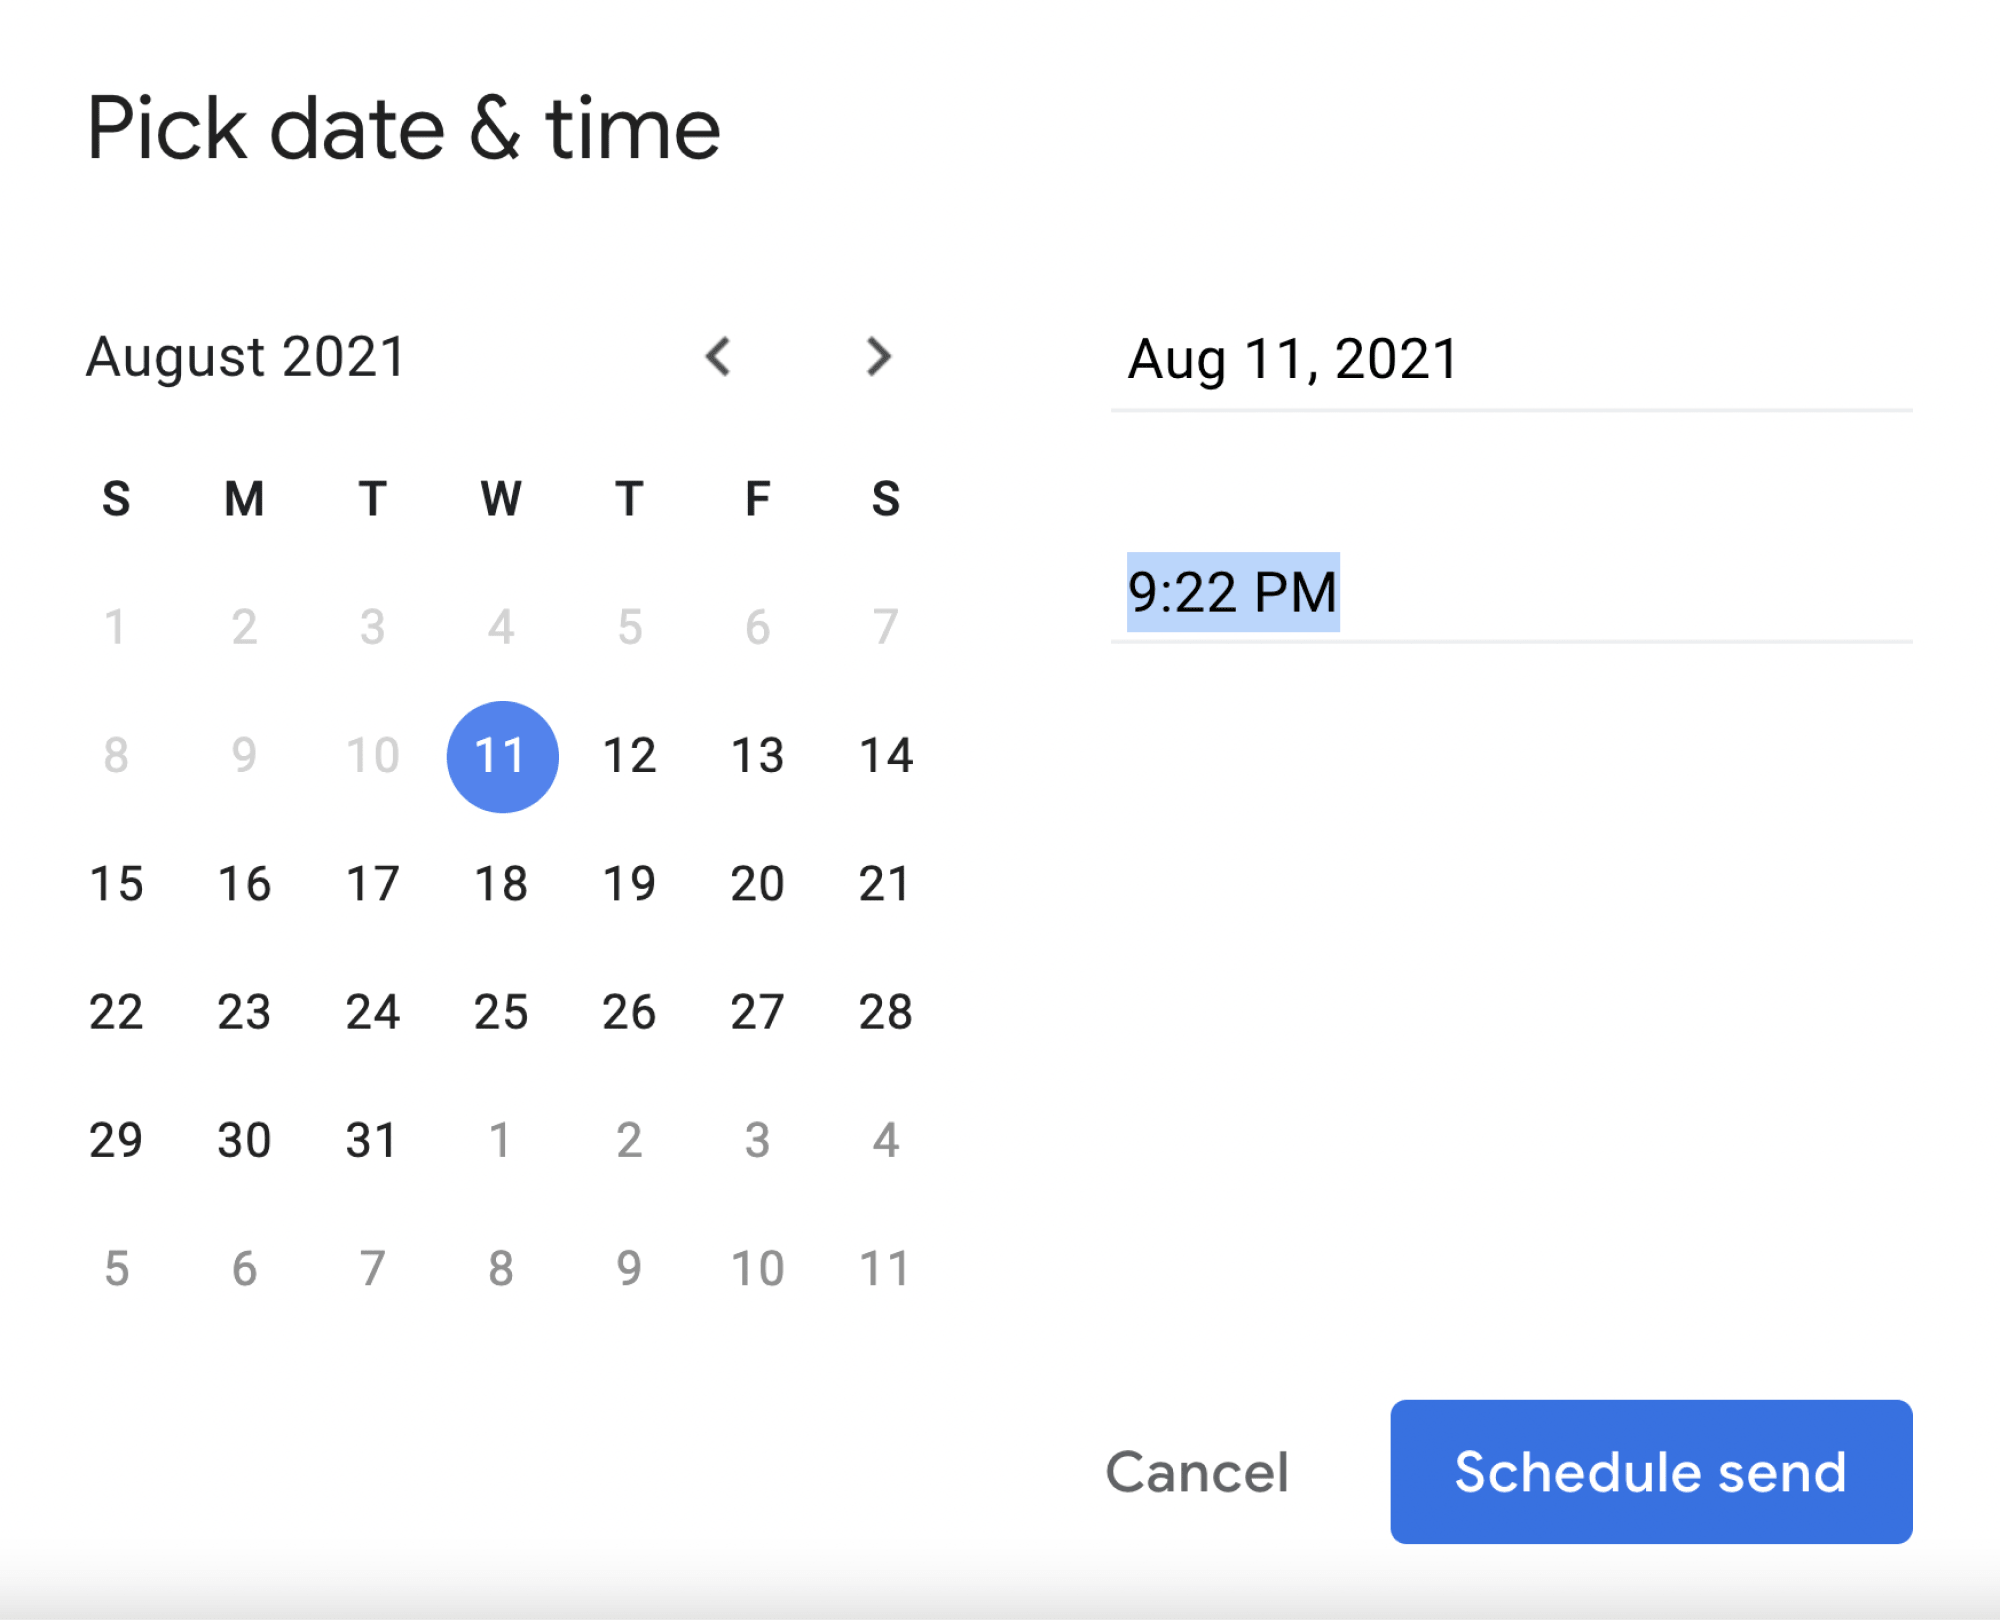
Step 6: Set the time and click on Schedule send. You just successfully set your email to send at a specific time.

View or edit scheduled email
Once you have scheduled your email, it is typical for most people to recall important details that they may have missed. If that’s the case for you, do not worry because you can still edit this email provided the set time has not been reached.
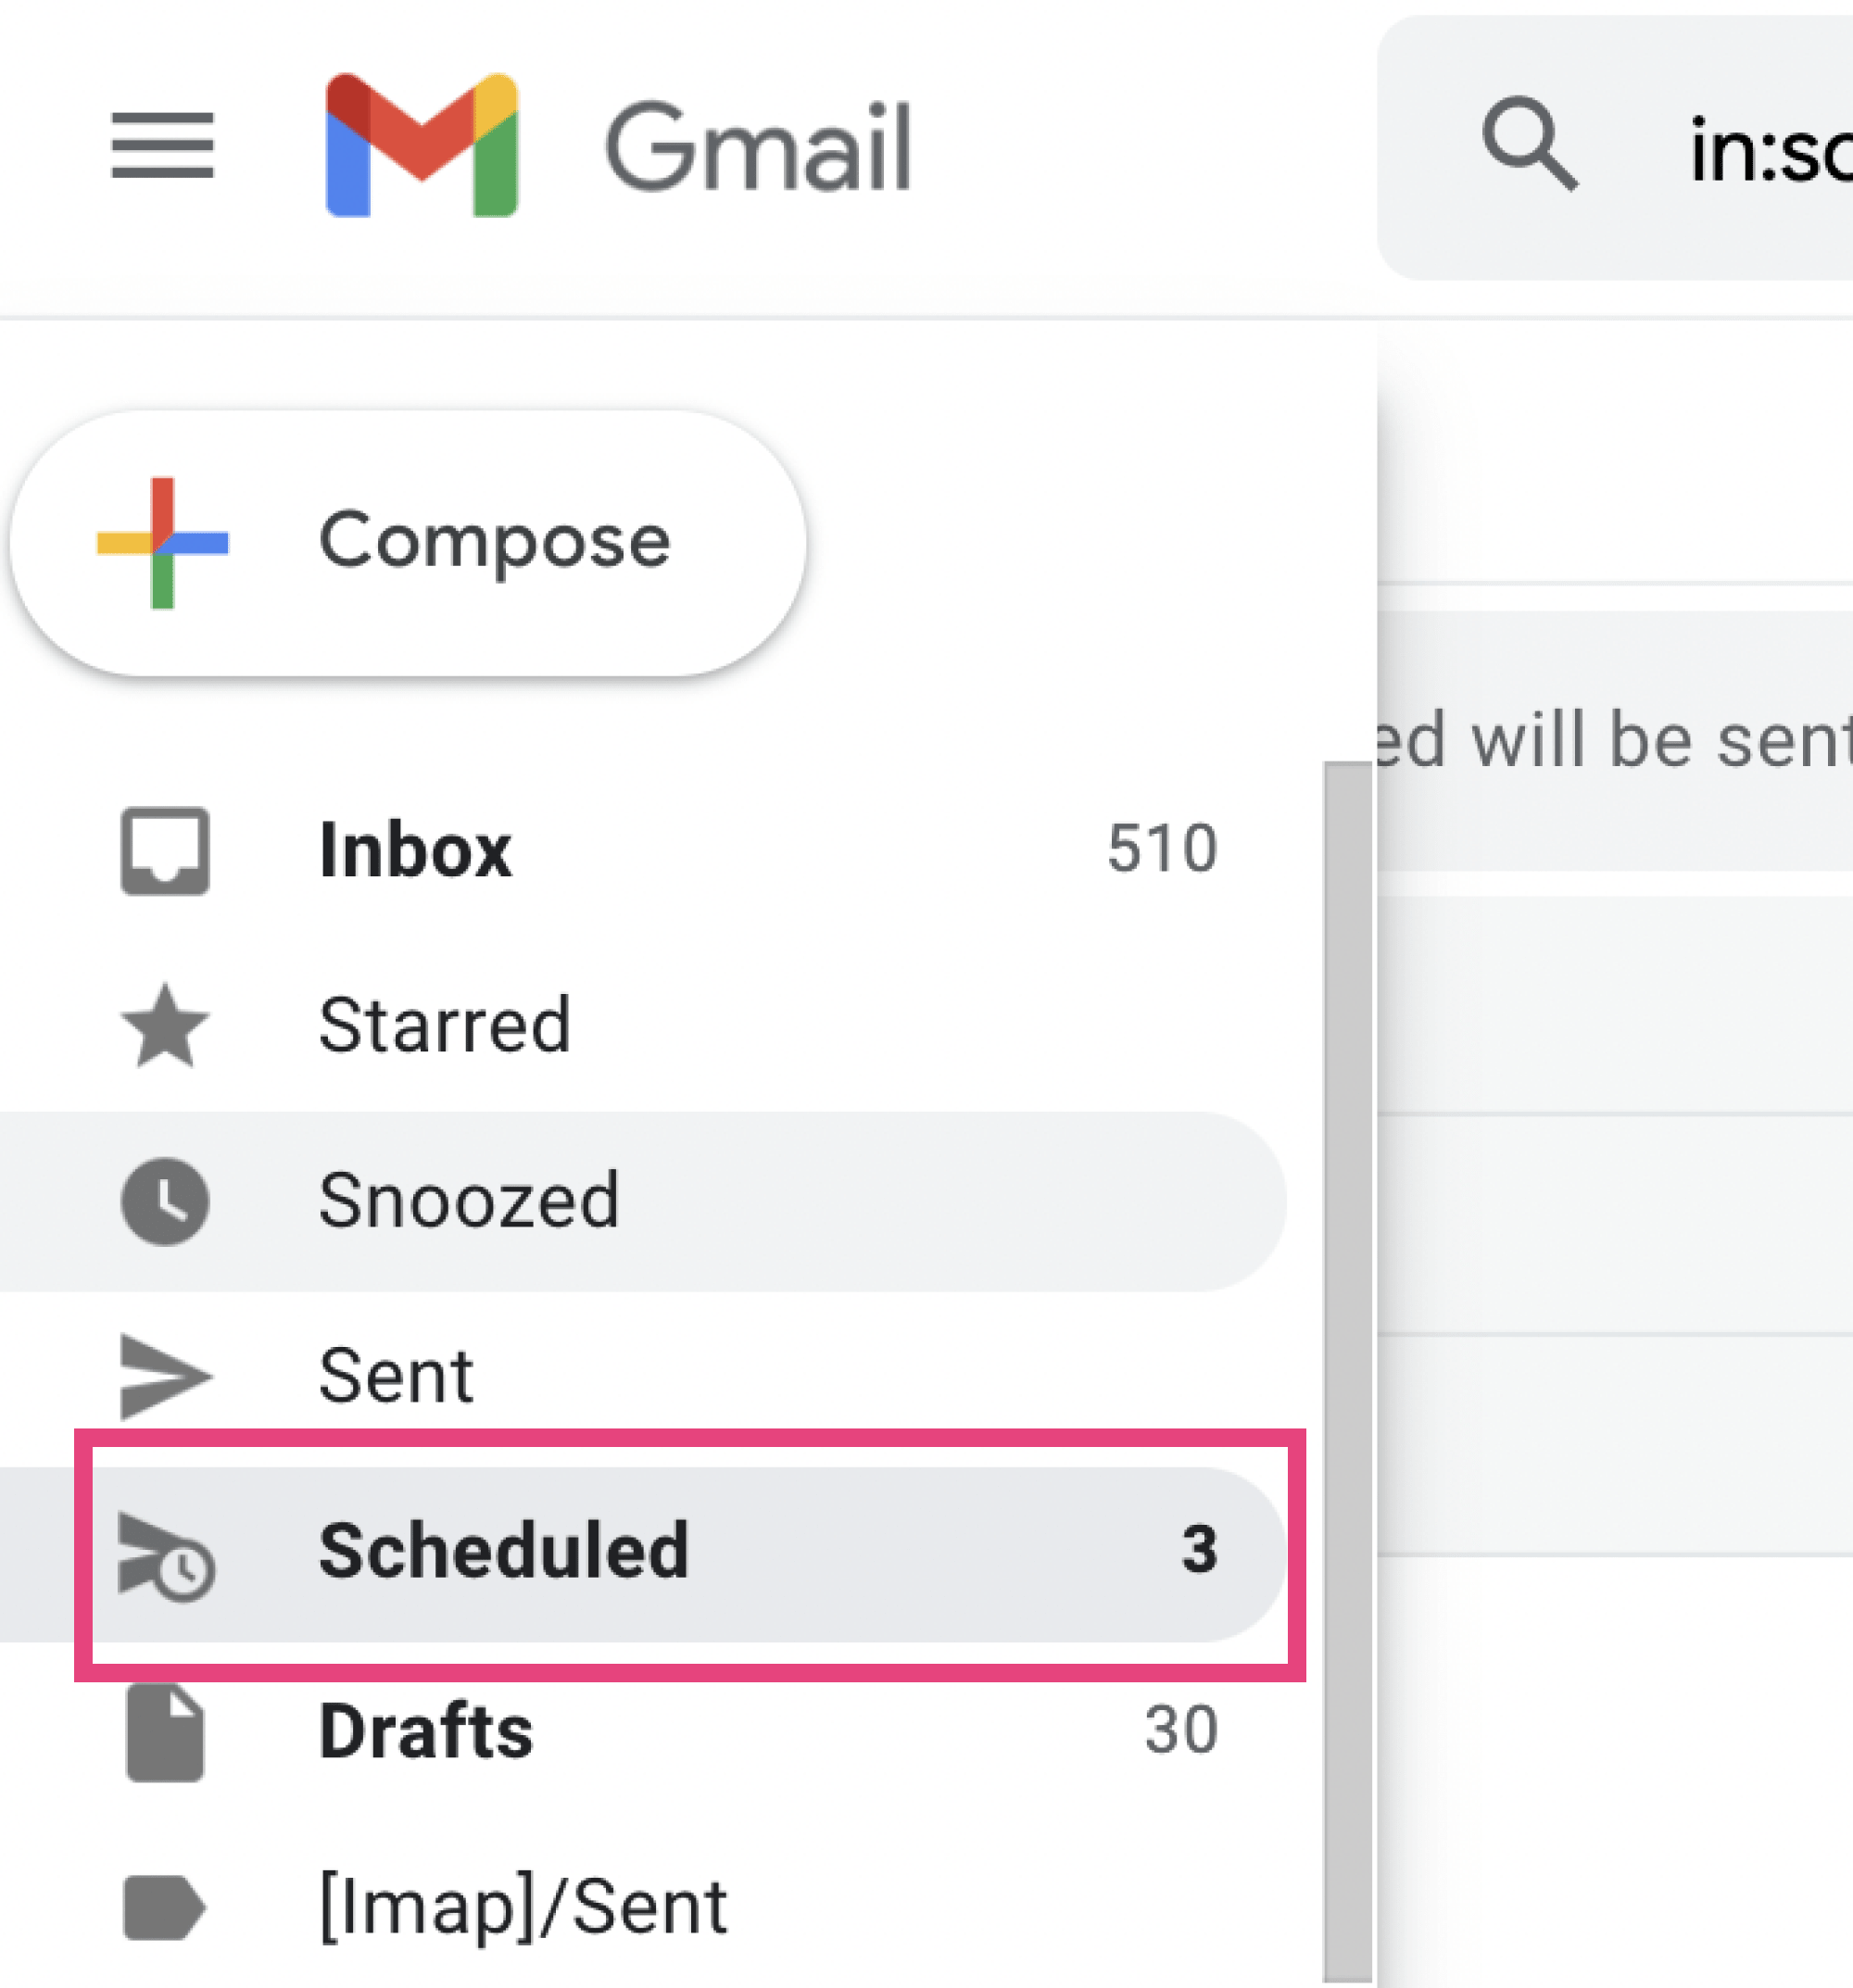
Step 1: “Click” on the “Scheduled” option from the main menu on the left-hand side of your mailbox
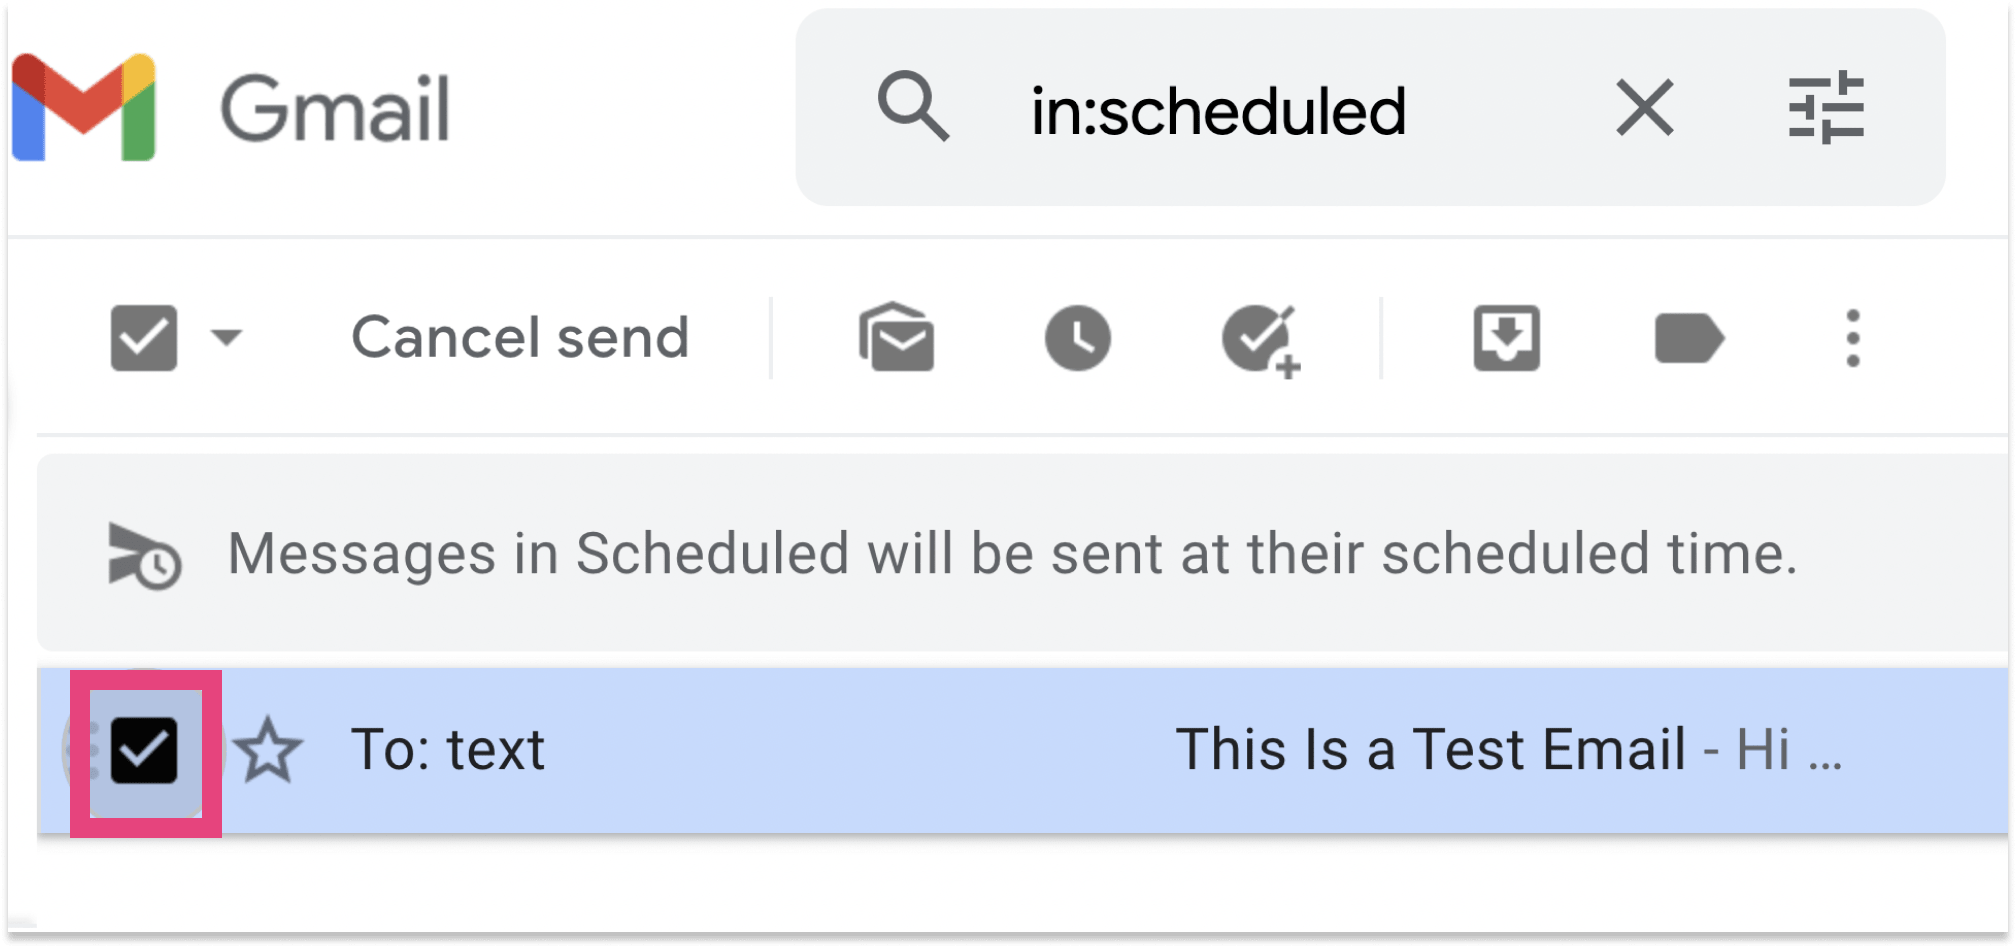
Step 3: First select “Cancel send” so that it goes to the Drafts label, only then you can edit the email,
Note: When you click on Cancel send, the email goes to the Drafts label. From there, you can edit it as desired, after which you can reschedule.
Cancel scheduled email in Gmail
The fact that you have scheduled an email does not mean that is the end. You can cancel a scheduled message if you have a change of heart or for reasons best known to you.
Follow these steps:
Step 1: “Navigate” to the “Scheduled label“

Step 2: “Select the email”

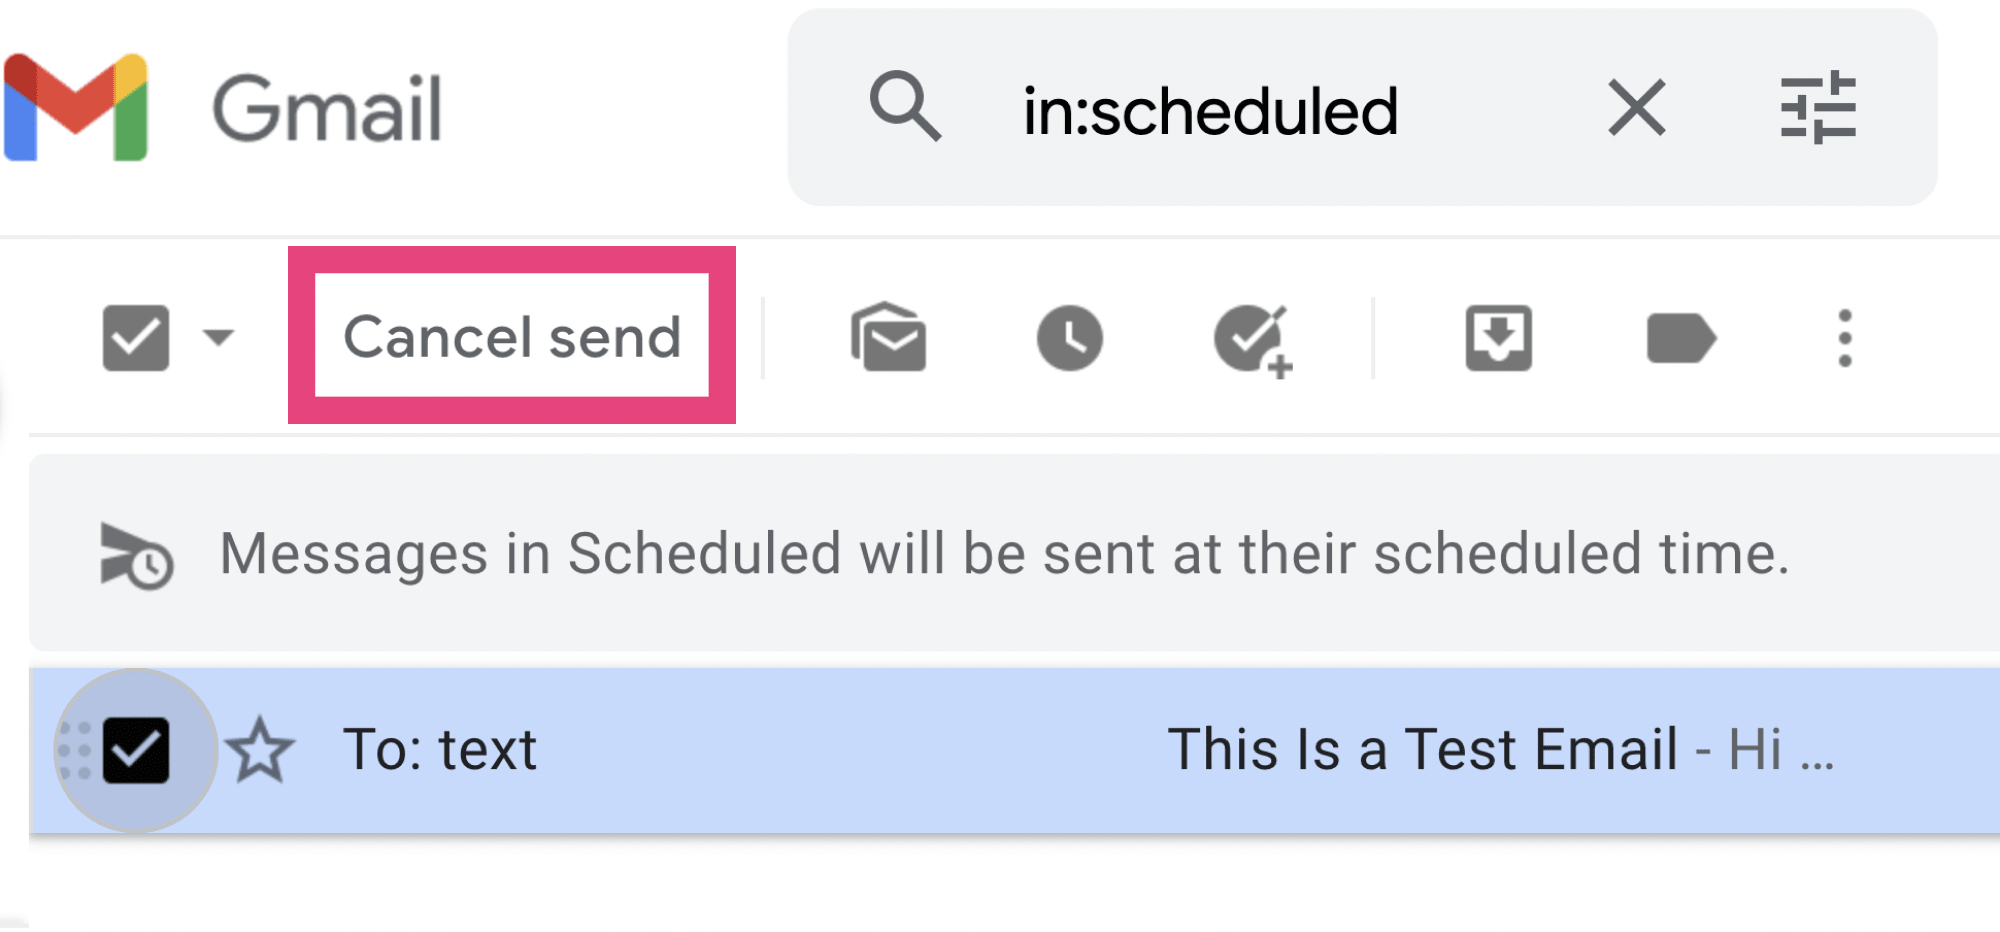
Note: When you click on the Cancel send, the email goes to your Drafts label. If you need to completely delete the email, navigate to the label and delete it accordingly
Step 3: “Click” on “Cancel send“
How do I send recurring emails in Gmail?
Whereas Gmail offers a way to schedule a single email, it does not support recurring emails. To get this functionality, you need to use an extension or an app.
This guide takes you through how to use Right Inbox
What are recurring emails?
The recurring email refers to an email message that you repeatedly send at different times. For example, you may have several clients to whom you would like to send birthday wishes. If you were to send the email only once, the chances are that you could forget to do so the following year.
With the recurring emails, you no longer have to worry about the messages that should be sent automatically, periodically, or as per your defined settings. All you have to do is set the time, date, and frequency at which the message goes out, and you are fully set.
Some instances where you could use recurring email include:
- Sending invoices when the amount is the same every month
- Weekly reminders for timesheet submission from your staff
- Weekly meeting agendas
How to send recurring emails using Right Inbox Gmail Extention
Step 1: Visit Chrome Store using the URL

Step 2: “Search” for Right Inbox, in the searching pad
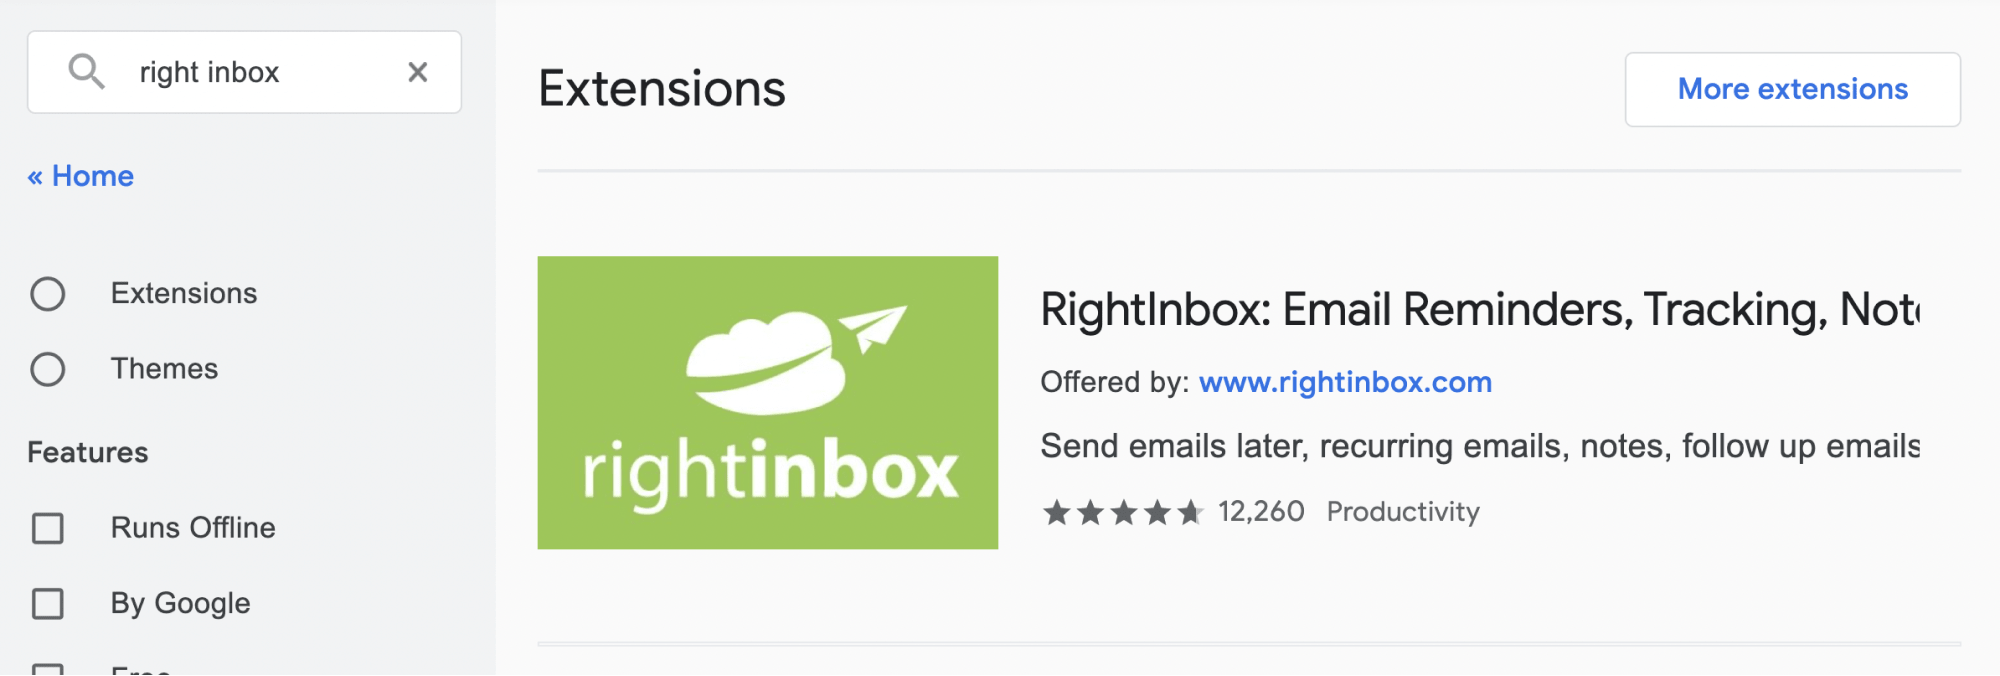
Step 3: “Add” the extension to your browser
Note: To add the extension, click on the correct link for Right Inbox. Please pay attention to the “Offered by” bit to ensure that you have chosen the right extension.
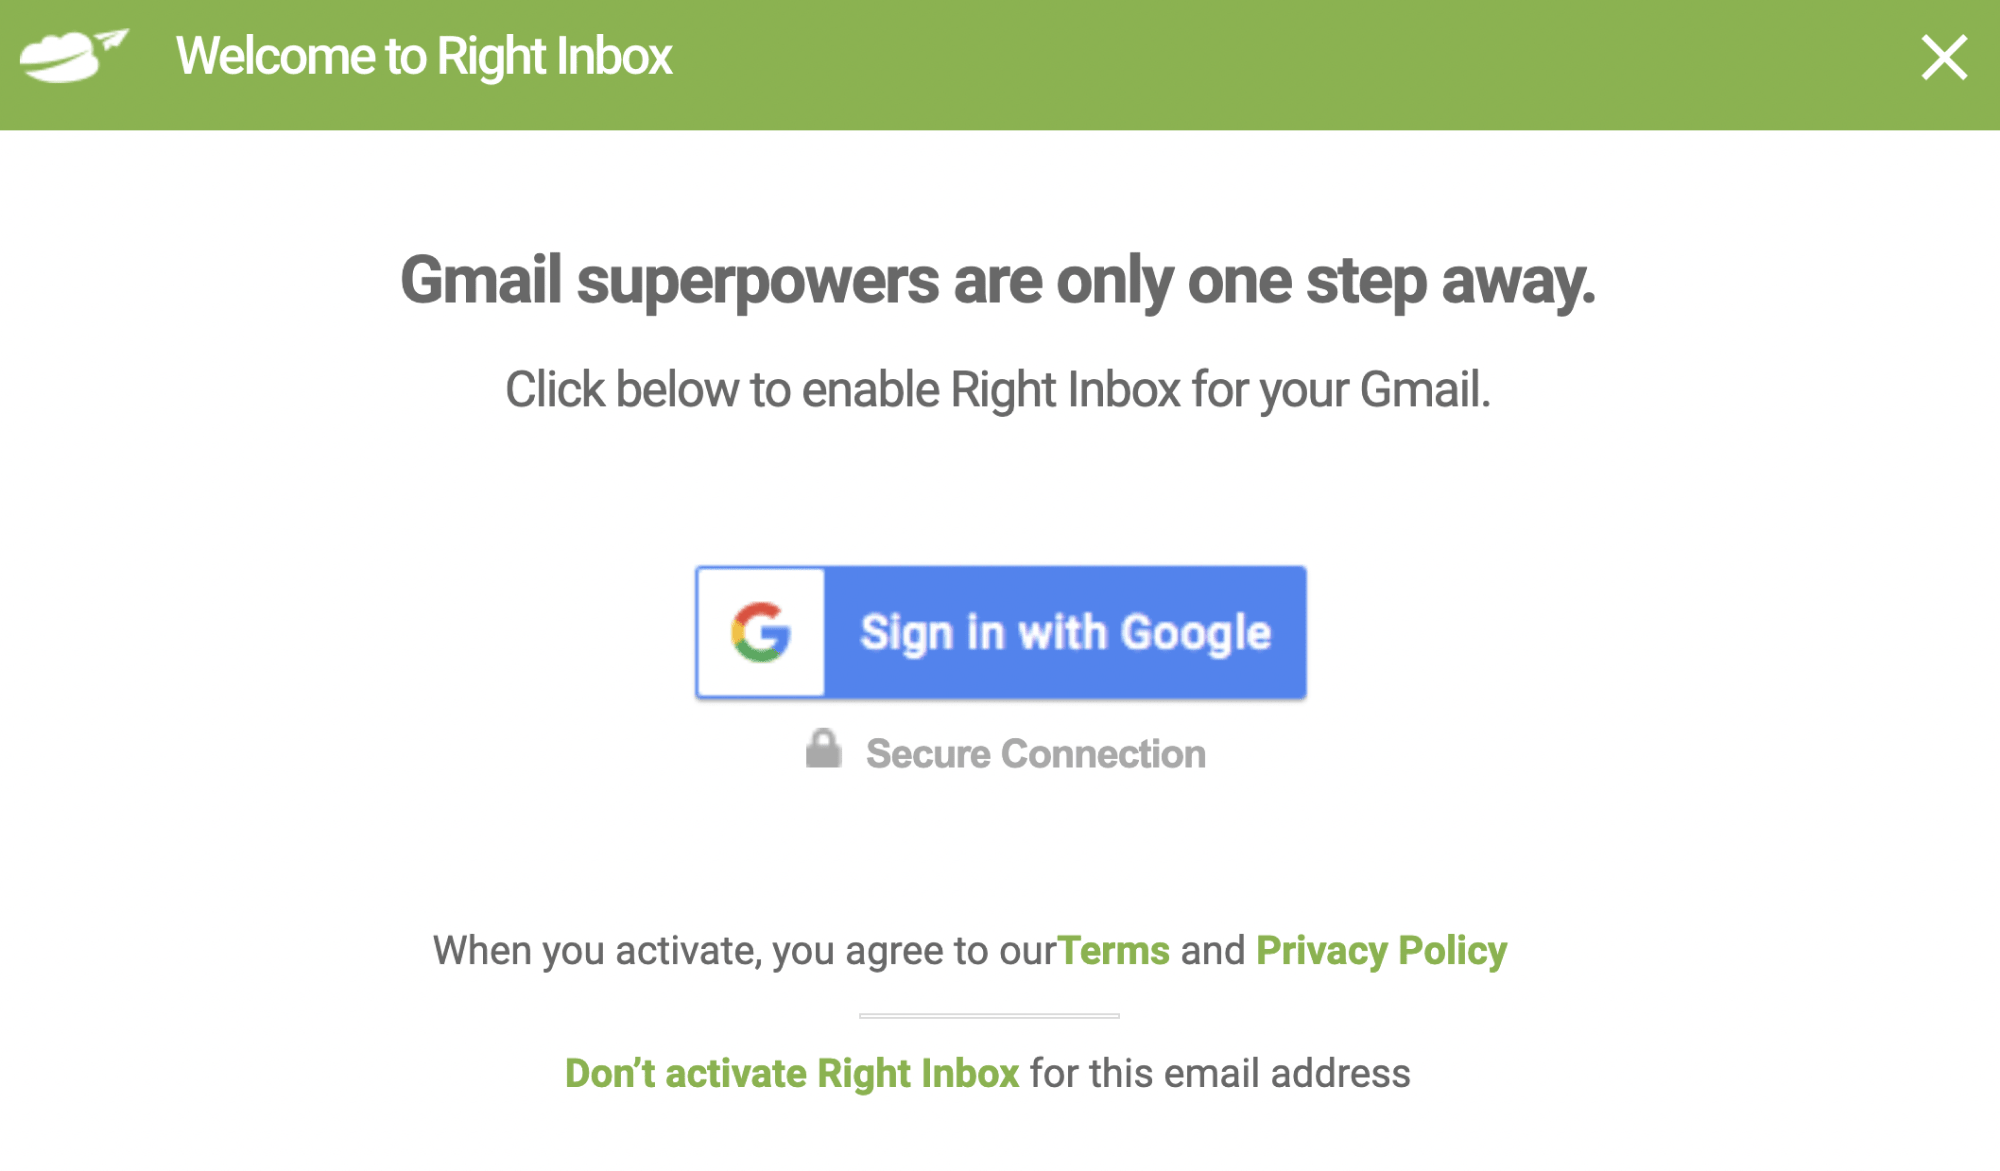
Step 4: “Log in” to “Right Inbox” with the respective email
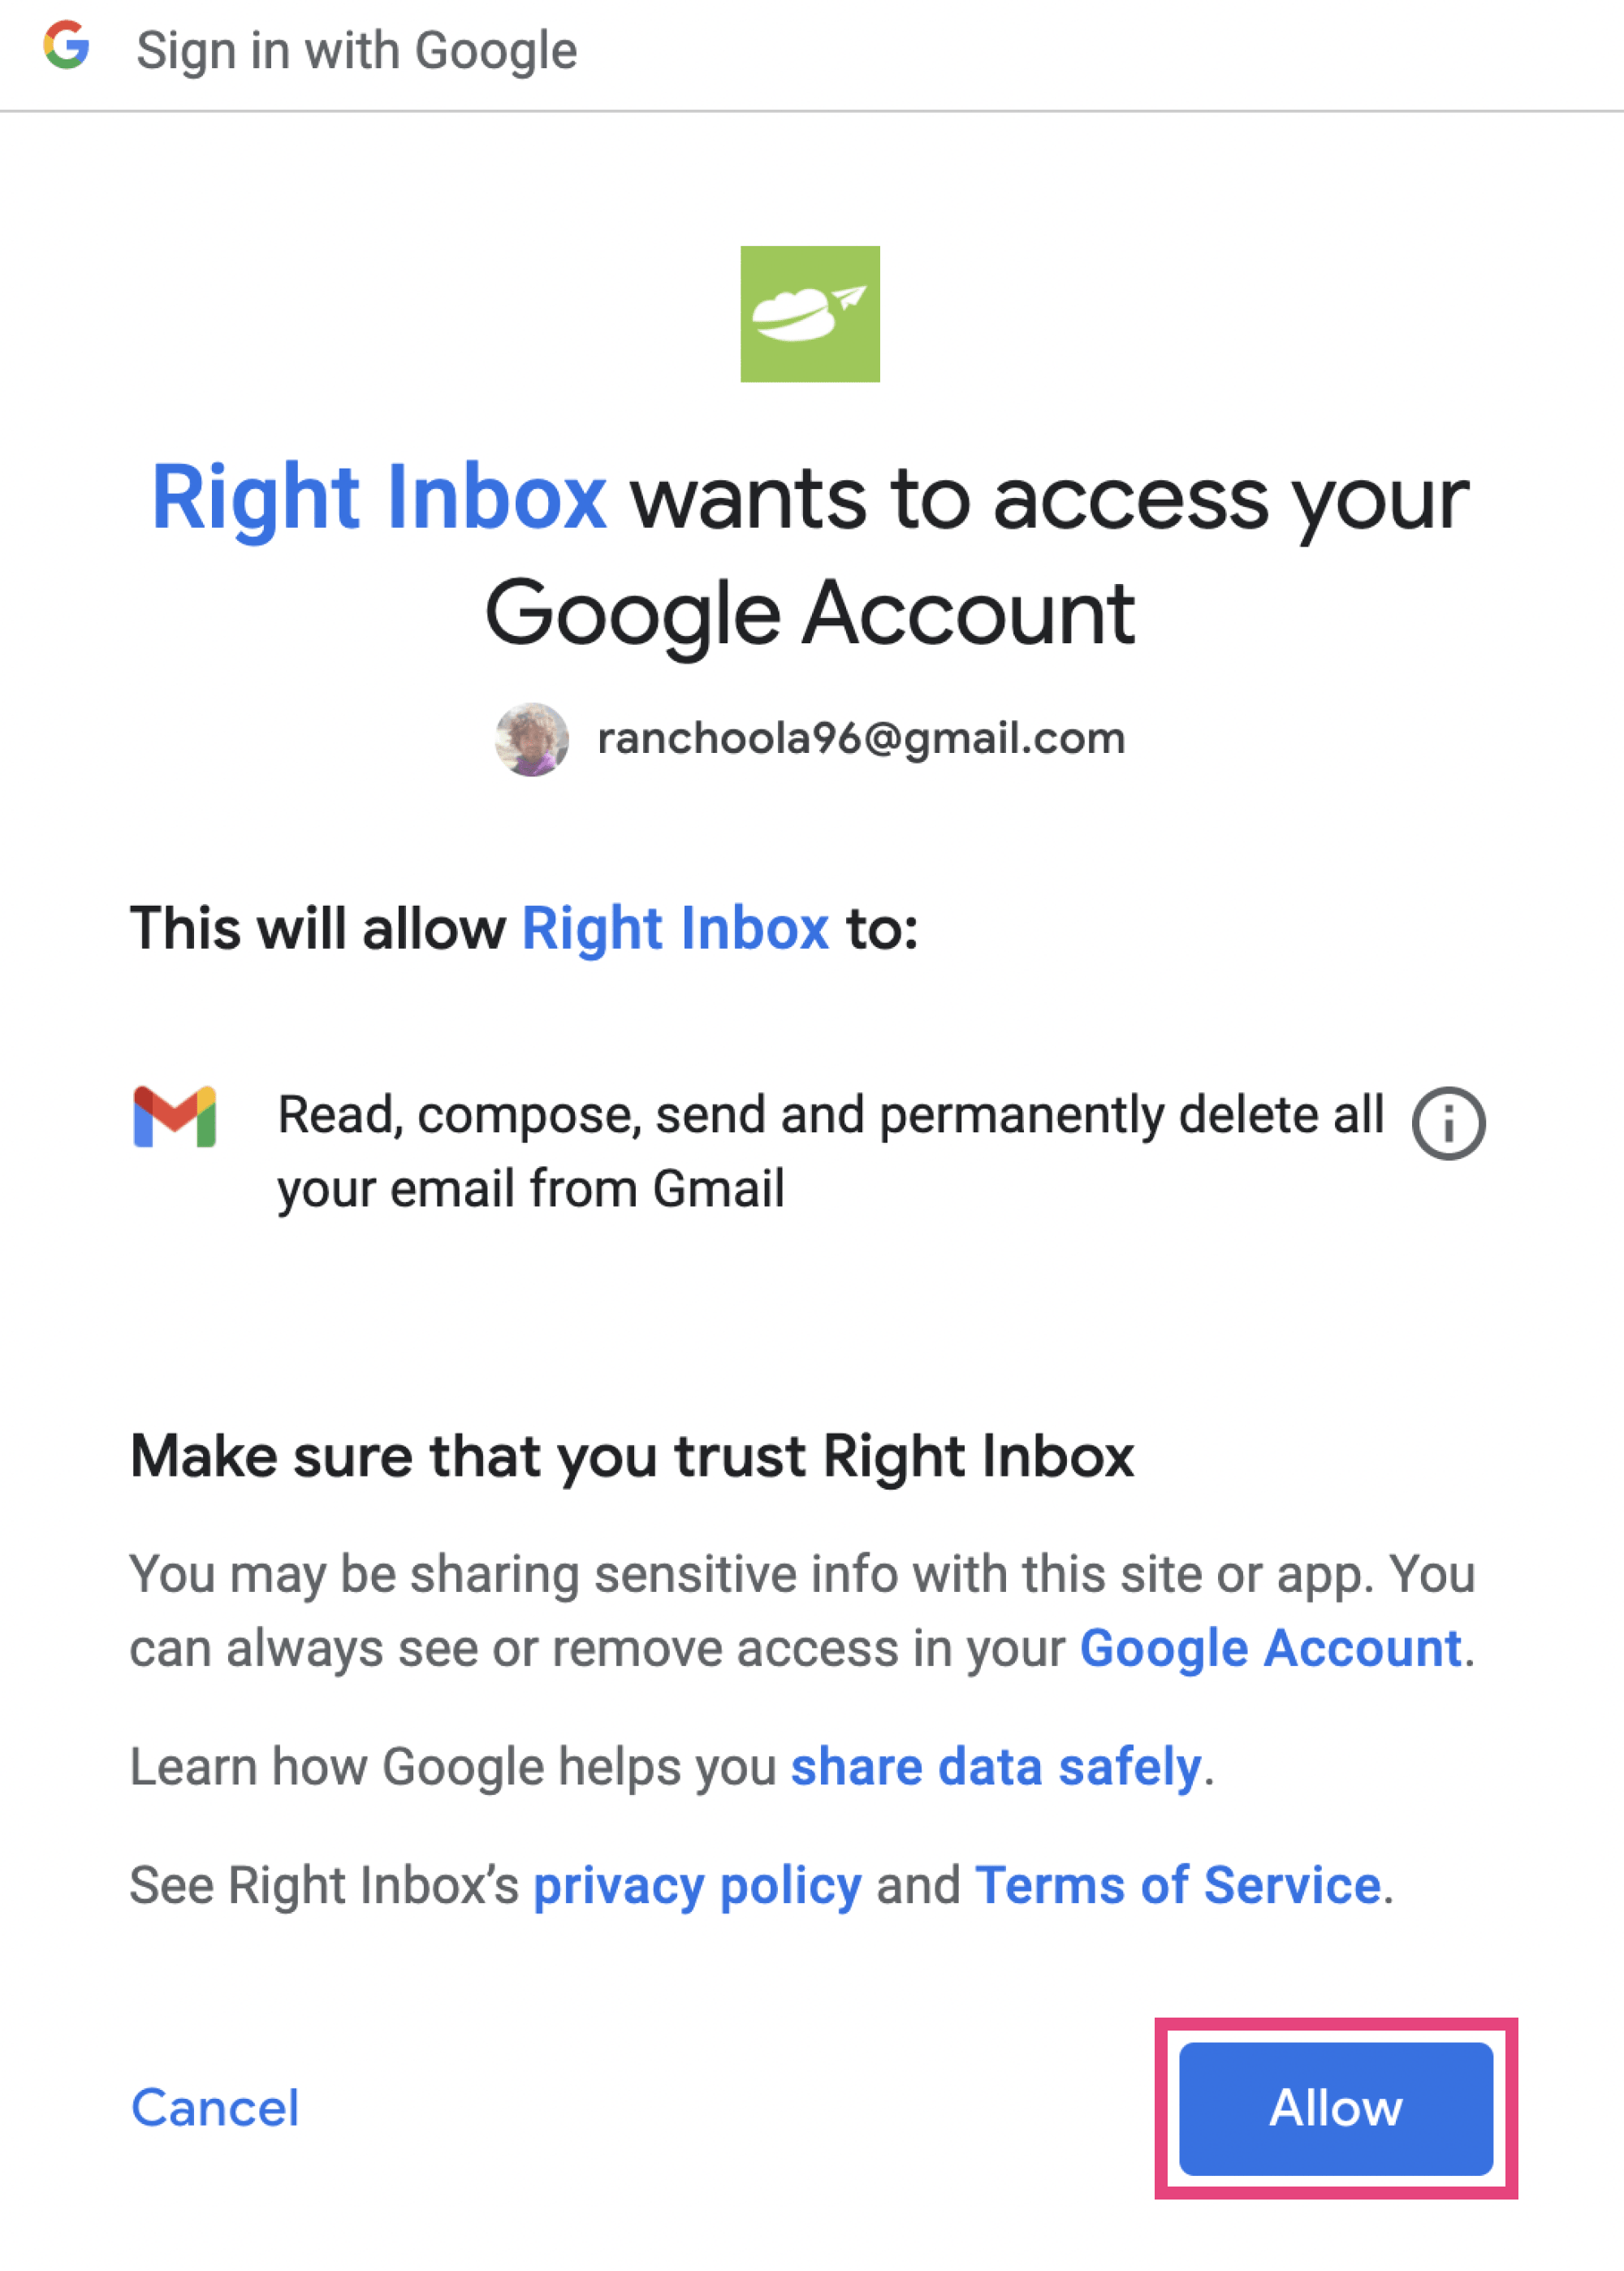
Step 5: “Give permissions” requested when “logging into Right Inbox“

Step 6: “Compose a new email” compose your email the normal way. When then, “Click” on the “Recurring button“
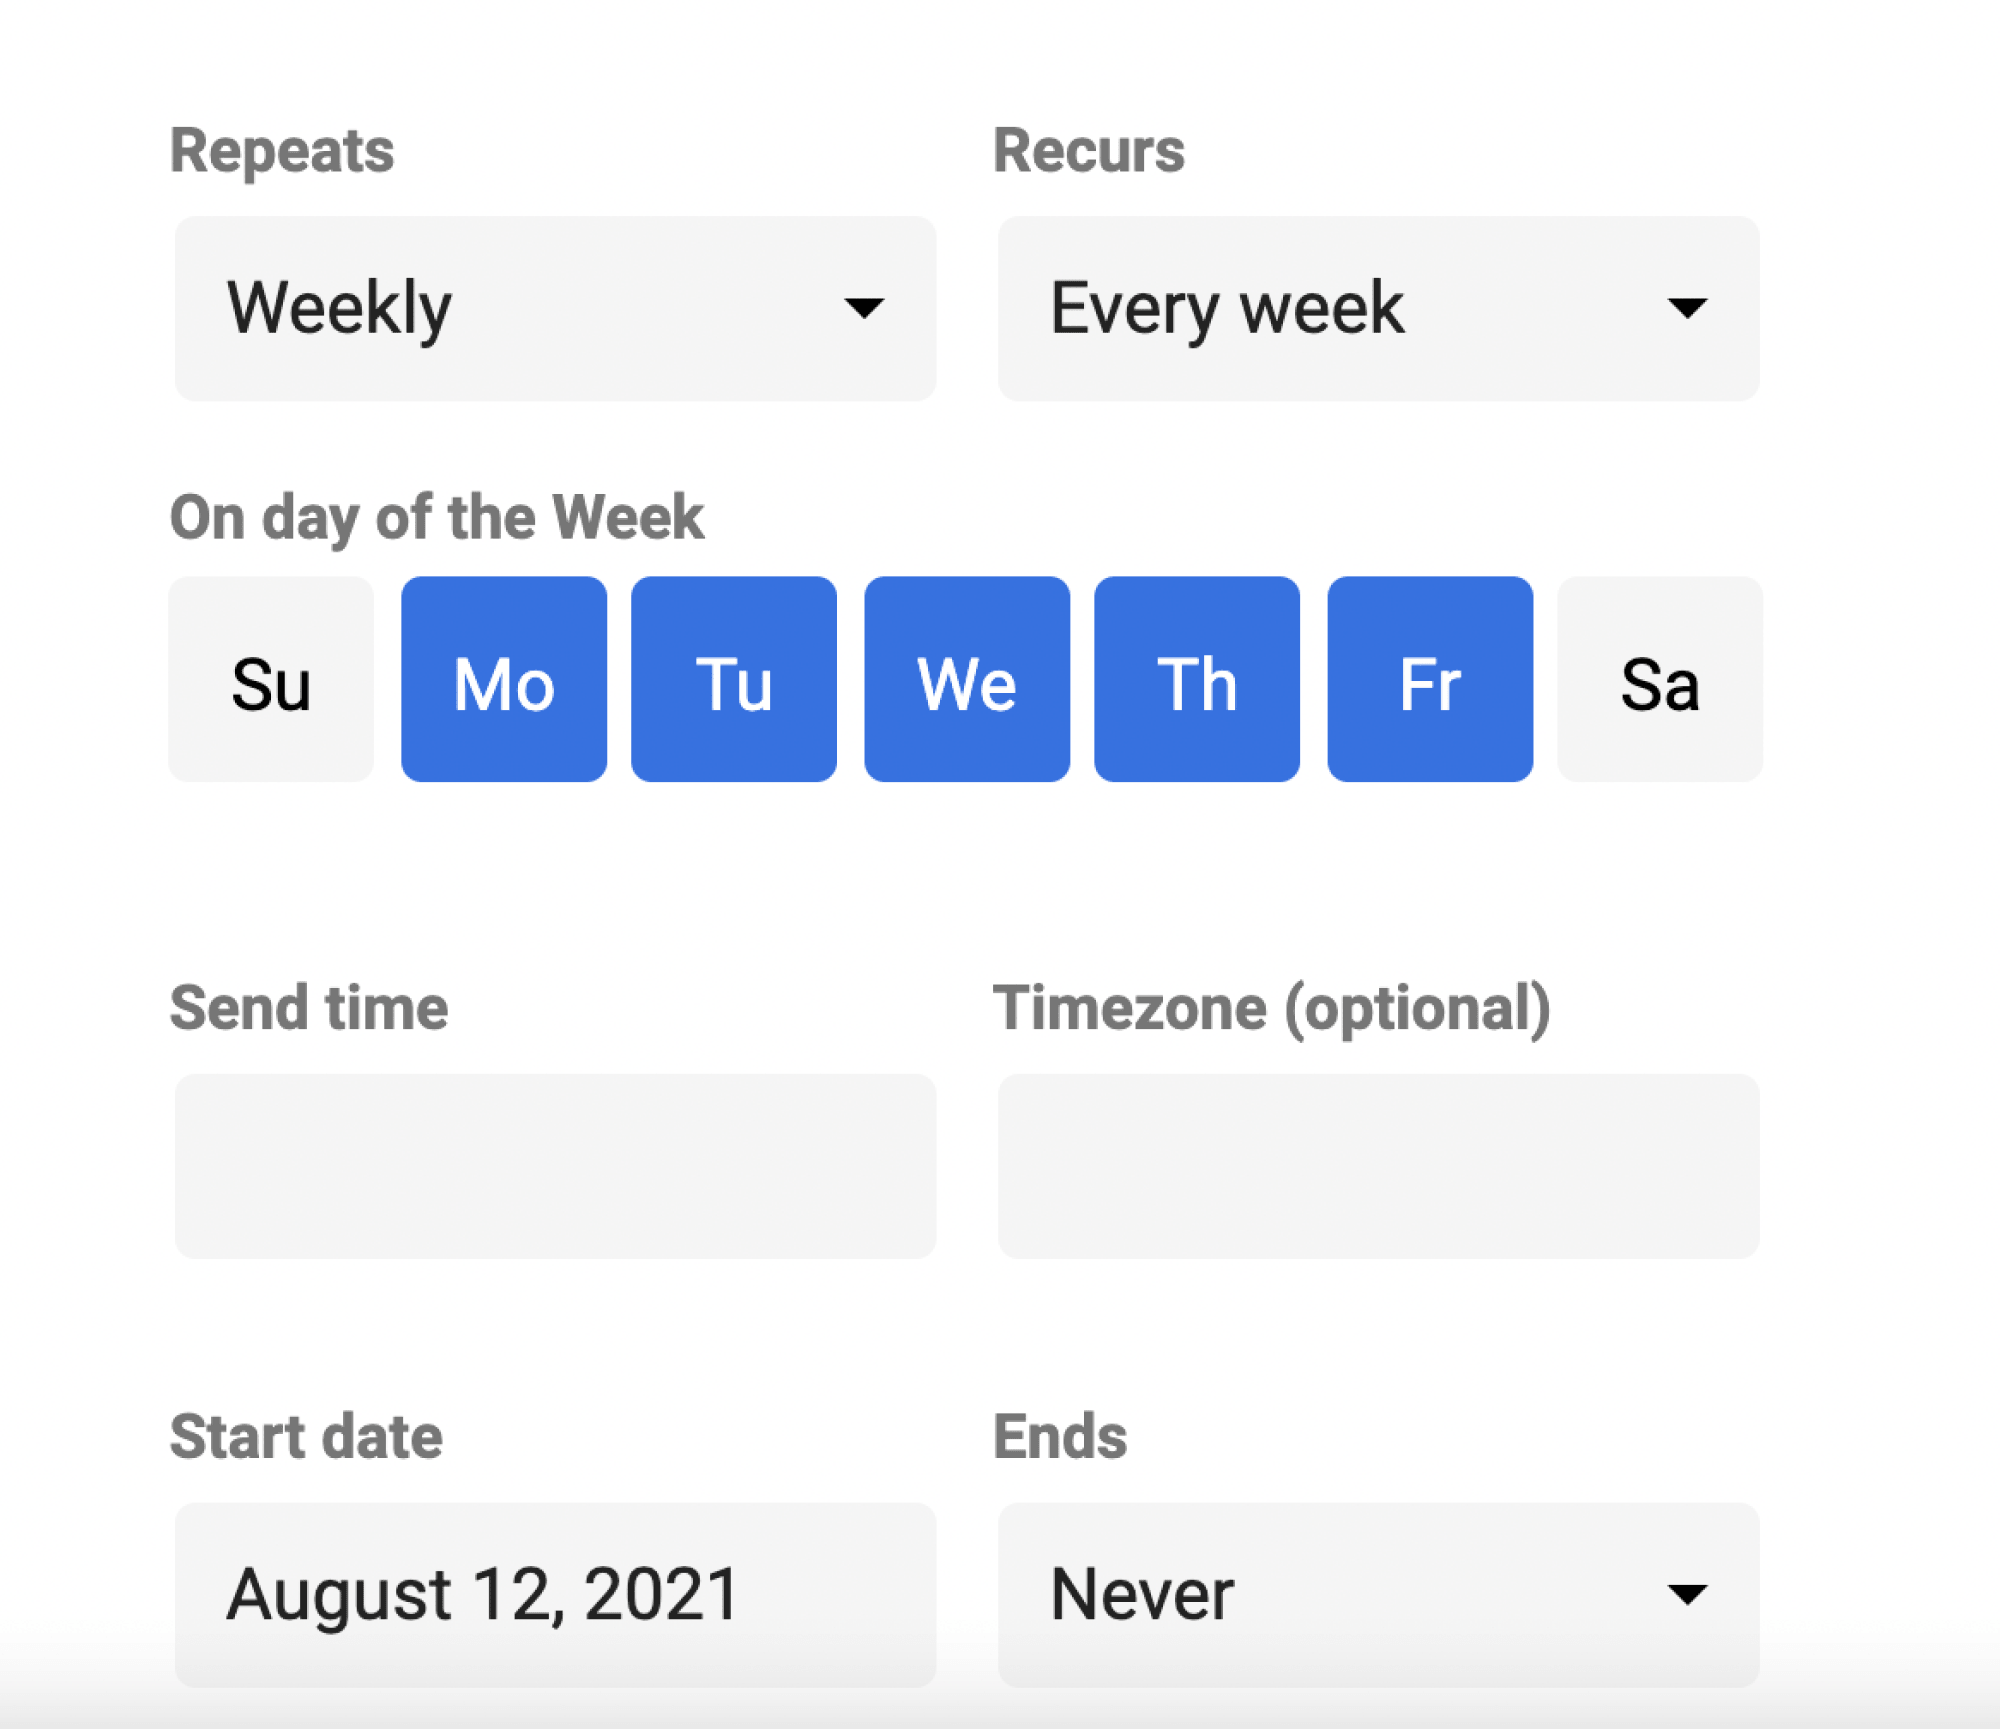
Step 7: “Define” the “Recurring Settings“
Note: As you can see from the image, you have various definitions to make. You can set the email to repeat daily, weekly, monthly, or yearly. Another important definition pertains to the “Send time” and the “Time zone,” although the latter is optional.
You also get to set the start date (When you would like the first recurring email to be sent) and End date (When the recurring feature stops). When you have chosen the Repeat rate, you also get to define the frequency. For instance, if you set your email to repeat daily, you can set the frequency to every day, every two days, every three days, and so on.
Step 8: Schedule the email
After you confirm all your definitions and are comfortable with the settings made, click on the Schedule option.
An important point worth noting is that the Recurring email feature in Right Inbox is available for premium users. Thus, if you are on the free version, you will have to upgrade your subscription accordingly.

Why Gmail schedule send not working
Sometimes you may face challenges with the Gmail schedule recurring email feature such that your emails do not get sent. If that is the case, you need to look at various possible reasons:
1. The schedule has reached its end
If you set Gmail scheduled message to recur at particular intervals and ends at a certain time, this could be the reason. For instance, you may have defined that Gmail schedule recurring email stops after ten messages. Needless to say, the emails will no longer send after the ten messages, and you will have to create a new schedule or extend the existing one.
2. Did not create a schedule
You need to confirm that you have created the schedule if you face a Gmail schedule send not working problem. Do not just assume. Navigate to the location the schedule email is supposed to be and confirm that it is indeed there.
3. General issues with Gmail or the extension
Although rare, Gmail or the extension in use can occasionally run into problems. If the service is unavailable, your emails will not send as expected.
Final thoughts
Gmail provides you with immense power to remain in contact with the people that matter the most. As you explore this email service, the ability to delay sending in Gmail adds flexibility to your emailing habits.
You could compose an email today and schedule it to send a week, month, or even a year later. Additionally, the recurring emails Gmail feature offered through extensions takes away the repetitive task of typing the same email from time to time.


